
To complete the checkout process, you must be logged into ToolWEB.com
Once you have selected the items you wish to purchase and have added them to your cart, locate the cart icon on the top right corner of the page. Click on the shopping cart icon to be directed to the shopping cart page.

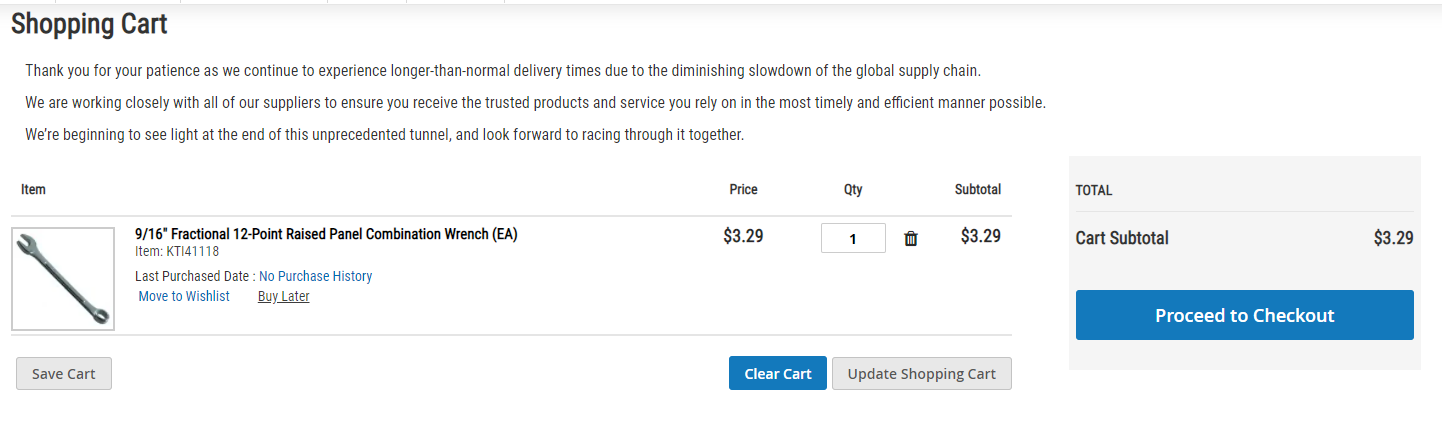
From this page you can save the cart for later, update the quantities on items in the cart, fully clear the cart, or proceed to checkout.
Clicking save cart will allow you to save the cart for later.
Clicking clear cart will remove everything from the cart allowing to start fresh.
Clicking update shopping cart will update any quantities or prices that have changed.
Clicking proceed to checkout will take you to the next part of the checkout process.
Verify the items in the cart are correct and update any items as necessary. Once ready, click proceed to checkout.

In step 1 of checkout, fill in the requested information: shipping method, shipping address and purchase order number. If you are shipping your order directly to a customer and do not want to include an invoice or any pricing information in your shipment, check the box for drop ship/no paperwork. This ensures that only an unpriced packing slip is included in your shipment. Enter a purchase order number for your order, if applicable. Once you have filled out all required fields, click continue to payment options. There may be a short delay before step 2 fully loads as our system is checking for the best possibly shipping methods and costs for you.
In step 2 of checkout, you will see all of your available payment methods, which can include credit cards or open terms. Select the payment method you wish to use.
For credit card:
Click the button next to credit card. You can choose any credit card you've previously saved to your account or enter a new card's details.
Your default billing address will automatically be chosen as the billing address. If you need to update this, locate the check mark next to the address and uncheck it. This will allow you to enter a different address for the billing address.
For Open Account:
Click the button next to open account. Please note at the top of the page that the shipping address is defaulted to be used as the billing address.
If the billing address is different than the shipping address, locate the check mark next to the address and uncheck it. This will allow you to enter a different address for the billing address.
At the bottom of the page there is an add comment field. This is used to specify any special instructions or notes for the salesman. Keep in mind that any orders with a comment will be automatically placed on hold until a salesman reads the comment and manually releases the order.
Note: If your order contains a BOGO deal, the comment field will be moved to the first step of checkout to allow you to change the address for your free good. Any additional order comments can be added to that text box, as well.
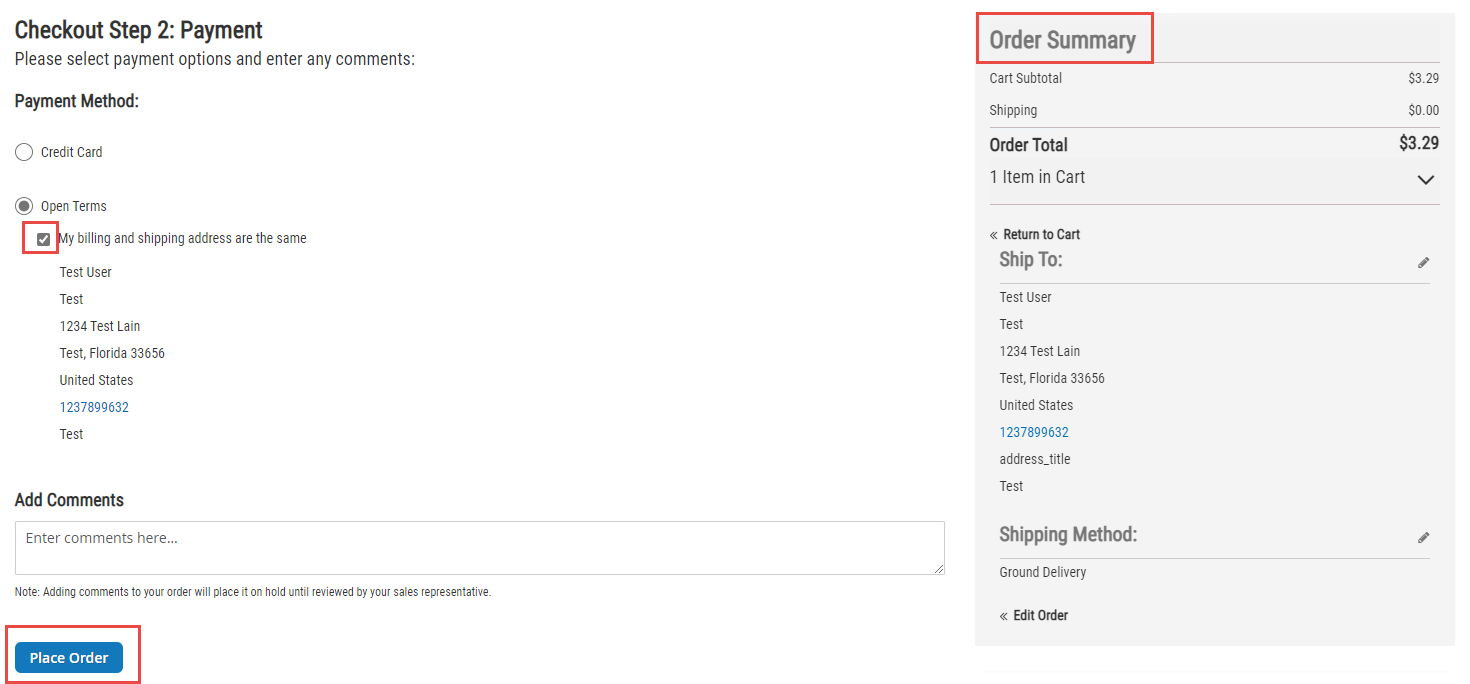
Locate the order summary at the top right of the page. Look over the order summary, including the total and shipping information, verified that everything is correct. Once you have verified that everything is correct, click the place order button at the button of the page to place your order.